How to Use the Effects Panel
The Effects panel allows you to customize the final appearance of your scene using post-processing effects. Use it to configure anti-aliasing, tone mapping, color grading, bloom, depth of field, and more.
Each effect has its own collapsible section, and changes are applied immediately in the Viewport, allowing you to preview the results in real time.
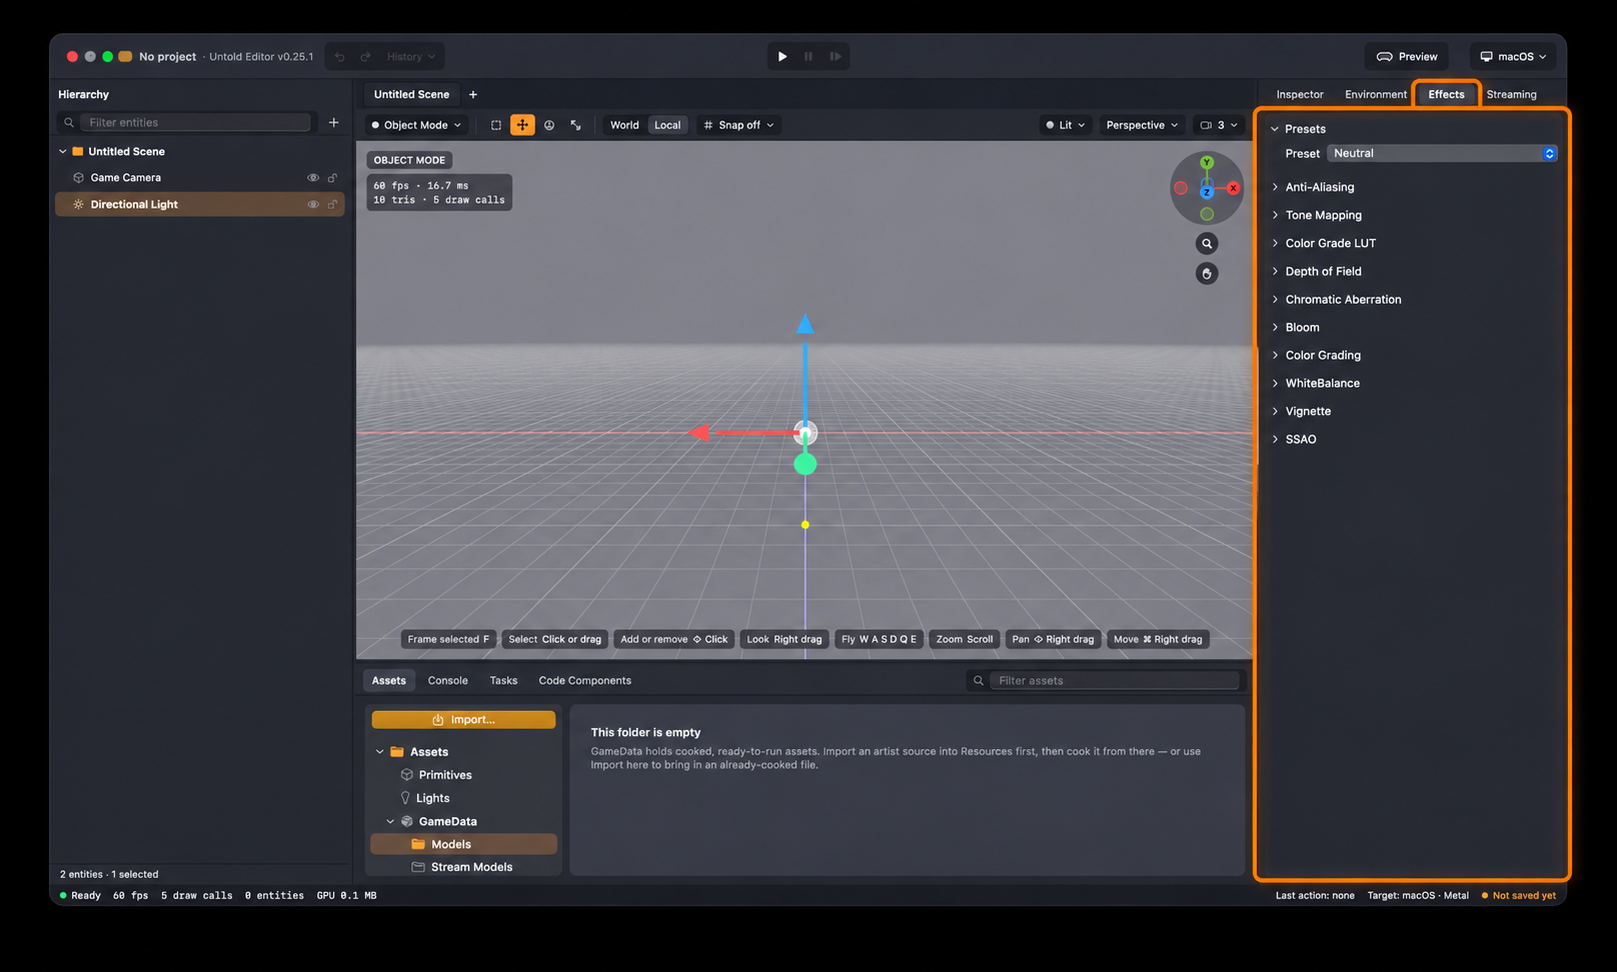
1. Start with an Effects Preset
Presets provide predefined combinations of post-processing settings that you can use as a starting point.
Expand the Presets section.
Select a preset from the dropdown:
Neutral: A balanced starting point for rendering.
Cinematic: A look designed for cinematic presentation.
High Contrast: Emphasizes differences between bright and dark areas.
Soft AO: A look emphasizing subtle ambient occlusion.
Archviz: A preset intended for architectural visualization.
The selected preset is applied immediately. You can further customize individual effects to achieve your desired look.
2. Configure Anti-Aliasing
Anti-aliasing reduces jagged edges and improves the visual quality of rendered objects.
Expand the Anti-Aliasing section.
Select an anti-aliasing mode:
Off: Disables anti-aliasing.
FXAA: A lightweight, screen-space anti-aliasing technique.
SMAA: Uses edge detection to smooth jagged edges.
MSAA: Uses multiple samples to improve geometric edge quality.
TAA: Uses information from previous frames to reduce aliasing and temporal flickering.
MSAA+TAA: Combines multisample and temporal anti-aliasing.
Depending on the selected mode, additional settings become available:
FXAA: Subpixel Quality, Edge Threshold, and Minimum Edge Threshold.
SMAA: Edge Threshold.
TAA / MSAA+TAA: History Weight, Clip Gamma, and Jitter Scale.
3. Configure Tone Mapping
Tone mapping controls how high-dynamic-range lighting values are converted into the final displayed image.
Expand the Tone Mapping section.
Select a tone mapping operator from the dropdown.
Preview the result in the Viewport to determine which operator best suits your scene.
4. Apply a Color Grade LUT
A Look-Up Table (LUT) allows you to apply a predefined color transformation to your rendered scene.
In the Asset Browser, select a
.cubeLUT file.Expand the Color Grade LUT section.
Toggle Enable LUT to activate LUT-based color grading.
Click Apply Selected LUT to apply the selected file.
The panel displays both the Selected LUT and Applied LUT, allowing you to see which file is currently selected and which one is being used.
5. Add Depth of Field
Depth of Field simulates camera focus by keeping objects at a particular distance sharp while blurring objects outside the focus region.
Expand the Depth of Field section.
Toggle Enable Depth of Field.
Adjust the following settings:
Focus Distance: Controls the distance from the camera to the focal plane.
Focus Range: Determines the depth of the region that remains in focus.
Max Blur: Controls the maximum blur applied to objects outside the focus region.
6. Add Chromatic Aberration
Chromatic Aberration simulates the color fringing that can occur around edges when different wavelengths of light are refracted differently by a camera lens.
Expand the Chromatic Aberration section.
Toggle Enable to activate the effect.
Adjust Intensity to control the strength of the color fringing.
7. Add Bloom
Bloom creates a soft glow around bright areas of your scene, helping simulate the appearance of intense light.
Expand the Bloom section.
Toggle Enable Bloom.
Adjust the following settings:
Threshold: Determines the minimum brightness required for a pixel to contribute to bloom.
Intensity: Controls the strength of the glow.
8. Adjust Color Grading
Color Grading allows you to fine-tune the overall color and brightness of your rendered image.
Expand the Color Grading section.
Toggle Enable Color Grading.
Adjust the following settings:
Exposure: Controls the overall exposure of the image.
Brightness: Adjusts the image's brightness.
Contrast: Controls the difference between light and dark areas.
Saturation: Adjusts the intensity of colors.
9. Adjust White Balance
White Balance allows you to correct or stylize the overall color temperature of your scene.
Expand the White Balance section.
Adjust the following settings:
Temperature: Shifts the image toward cooler or warmer tones.
Tint: Adjusts the balance between green and magenta tones.
10. Add a Vignette
Vignetting darkens the edges of the image, helping draw attention toward the center of the scene.
Expand the Vignette section.
Toggle Enable to activate the effect.
Adjust the following settings:
Intensity: Controls the strength of the vignette.
Radius: Determines how far the vignette extends toward the center.
Softness: Controls how gradually the darkening transitions into the image.
11. Add Screen-Space Ambient Occlusion (SSAO)
SSAO adds contact shadows and subtle darkening around nearby surfaces, helping improve the perception of depth in your scene.
Expand the SSAO section.
Toggle Enable SSAO.
Adjust the following settings:
Radius: Controls the sampling distance used to estimate occlusion.
Bias: Helps reduce unwanted self-occlusion artifacts.
Intensity: Controls the strength of the ambient occlusion effect.
Tip: Start with a preset, then adjust individual effects while observing the results in the Viewport. Some effects, particularly anti-aliasing, SSAO, and depth of field, can affect rendering performance, so evaluate your settings on your target device.