How to Use the Hierarchy
The Hierarchy panel displays all entities in your scene in a tree structure. Use it to select, organize, and manage entities and their parent-child relationships.
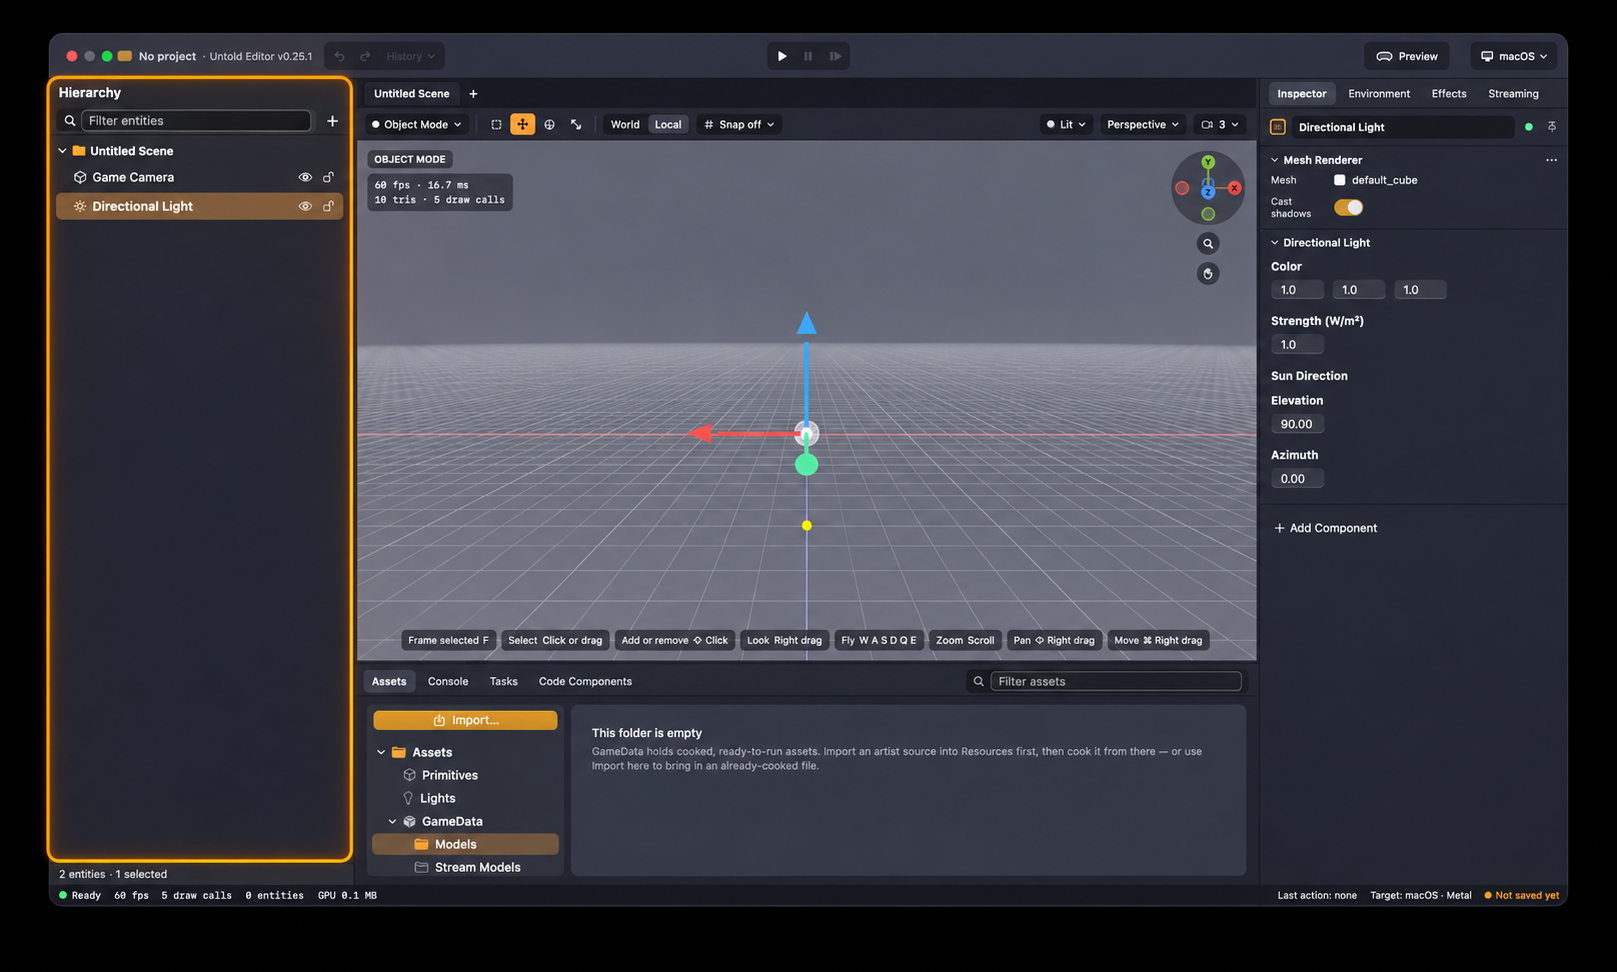
1. View and Select Entities
The Scene Root appears at the top of the Hierarchy. Click it to select the entire scene.
Click any entity to select it. Hold Shift or ⌘ Command while clicking to select multiple entities.
Click the arrow next to an entity to expand or collapse its children.
Note: The Hierarchy is read-only during Play Mode. Stop playback to enable selection and editing.
2. Find an Entity
Enter an entity's name in the Filter field at the top of the panel.
The Hierarchy displays matching entities and their parent entities, making it easy to locate them within the scene.
Clear the filter to display all entities again.
3. Add a New Entity
You can create an empty entity in two ways:
Click the + button at the top of the Hierarchy and select Empty Entity.
Alternatively, right-click an existing entity and select Add → Empty Entity to create a child entity.
4. Manage Entities
Right-click an entity to access the following options:
Show/Hide: Toggle the entity's visibility in the Viewport.
Lock/Unlock: Prevent the entity from being selected or edited in the Viewport.
Unparent: Remove the entity from its current parent and move it to the Scene Root.
Delete: Remove the entity from the scene.
5. Organize Entities with Drag and Drop
Reparent an entity: Drag an entity onto another entity to make it a child.
Add assets to the scene: Drag a model, light, or primitive from the Asset Browser directly into the Hierarchy.
Choose where to place it: Drop the asset onto the Scene Root to add it at the top level, or onto an existing entity to make it a child.
6. View Scene Statistics
At the bottom of the Hierarchy panel, you can see:
Total Entities: The number of entities in your scene.
Selected Entities: The number of entities currently selected.
These statistics provide a quick overview of your scene's structure and selection.